I know. I know. I did say that I was not going to bake with chocolate for a while.
And I am sticking to it!!
Honestly, I am.
I can hear you say, “BUT!! BUT!! Diana, this cake contains CHOCOLATE!”
Yes, it does. But it simply does not count.
“WHY NOT?”
Well, this month, for our monthly baking session at the Cake Slice Bakers, we were given a choice of four cakes to bake.
The first was a Hungarian Poppy Seed Cake. I don’t like poppy seeds. They sort of remind me of birds. And I am not overly fond of birds. Unless they can be eaten. But that’s another story. The second was a Golden Peach Cake. It is IMPOSSIBLE to find good peaches in Singapore. So that was out too. And the third was a Very Berry Roulade. Well, I don’t have a roulade pan.
So I had only one cake left to bake.

And it was this Chocolate Marble Cake.
See!! I was FORCED to bake with chocolate.

Anyway, I know that I had recently shared a very similar recipe – a Zebra Bundt Cake with Chocolate Glaze – but to be fair. this cake is more buttery than chocolaty. In fact, it is a variation of the Best Yellow Cake, which I really do adore.
While I love Carole Walter’s recipes, I admit they can be rather confusing because they are very detailed. Take this cake, for example. The recipe took up three pages. I kid you not. I read it about five times before I made the cake. Yet in reality, it is a really easy cake to bake.

So what I did was to simplify the process.
I started by melting the chocolate with shortening over a ban marie. Once the chocolate and shortening had melted, I added the honey, baking soda and the mixture of water and espresso powder.

Once mixed, this was set aside to cool. As it cooled, it would thicken.

In a mixing bowl, I creamed together butter and sugar.

Once the mixture had turned light and fluffy, I added the eggs, one at a time and mixed.

When the eggs had been incorporated, I added the vanilla extract and mixed.
The flour mixture and milk were added in the sequence flour-milk-flour-milk-flour, and mixed after each addition.


When everything had been incorporated, the batter was ready.

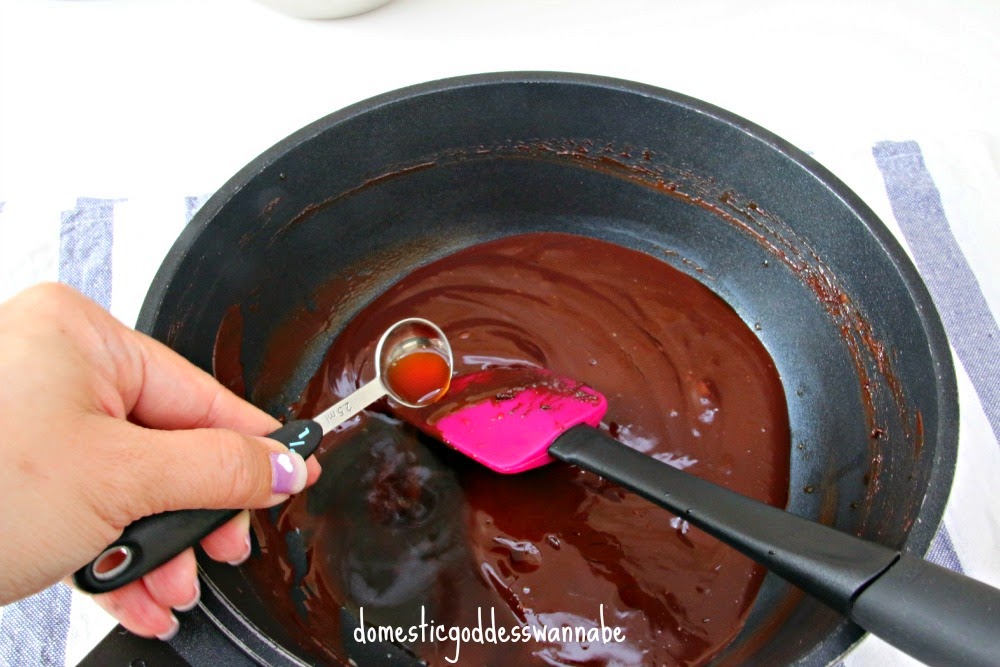
I transferred a cup of the vanilla mixture into the chocolate mixture, and whisked to mix.


Into a greased Bundt pan, I added half of the vanilla mixture.

Onto this, I added the chocolate mixture and used a spatula to very gently spread the mixture.

Then I repeated with the remaining original batter.

Finally I used a palette knife (or just any knife) and made circular patterns in the batter. Do not over mix or you will end up with a chocolate cake!

The cake was baked and cooled.


This really was one gorgeous cake!

Then I made the glaze.
Now, I have to say that I really loved the taste of this glaze. BUT!!! I really hated its consistency. It was IMPOSSIBLE to pour the glaze onto the cake because it sort of fell out in globs.
I was very unhappy.
I think a vanilla glaze, or a praline glaze, or even this chocolate glaze would have worked a lot better!
Having said that, this is a fantastic glaze for cookies, so I have decided to include the instructions for making this glaze here as well.
Into a saucepan, I added the cream, corn syrup and chocolate. This was placed on low heat and stirred until the chocolate had melted and the mixture had come together. This was then taken off the heat and placed on a ice bath (a bowl with some ice and water). DO NOT let any water get into the chocolate!!!

Once the mixture was relatively cool (you can place your finger and not scream in pain) add the coffee liqueur and the vanilla extract. Stir to mix.

After the mixture had come together, I placed it through a sieve to remove any air bubbles.

I used the glaze to decorate my plate since I had already made it.

Admittedly it tasted FANTASTIC.
But I hate globs.
I really do.

- 1 1/2 ounces (45g) unsweetened chocolate, coarsely chopped - I used Valrhona 70%
- 1 1/2 tablespoons (21g) vegetable shortening - I used Crisco
- 2 tablespoons (42.5g) honey
- Scant 1/2 (1.5g) teaspoon baking soda
- 1 teaspoon (7g) espresso powder - I used Illy
- 2 tablespoons (30ml) boiling water
- 2 1/3 cups (233g) sifted cake flour [not self-rising flour]
- 2 teaspoons (8g) baking powder
- 1/2 teaspoon (2g) salt
- 1/4 teaspoon (1g) freshly ground nutmeg - I used bottled ground
- 3/4 cup (170g) unsalted butter, at room temperature
- 1 1/2 cups (300g) caster sugar - I reduced this by 50%
- 4 large eggs, at room temperature
- 1 teaspoon (5ml) vanilla extract
- 3/4 cup (180ml) milk, at room temperature
- 1/2 cup heavy cream
- 1 tablespoon light corn syrup
- 4 ounces semisweet or bittersweet chocolate, coarsely chopped
- 1 to 2 tablespoons coffee liqueur
- 1/2 teaspoon vanilla extract
- Position rack in the lower third of the oven and preheat to 350 degrees F. Butter well a 10-inch Bundt pan. Dust with all-purpose flour and invert
- over the sink, tapping out the excess.
- To make the cake: In a small bowl, melt the chocolate and vegetable shortening over hot water or in a microwave oven, using a medium setting. Stir well to be sure the chocolate is completely melted. Blend in the honey. Sprinkle the baking soda over the top of the chocolate and blend well. Dissolve the espresso in the boiling water and add to the chocolate
- mixture, stirring until completely smooth. Set aside. The mixture will
- thicken as it stands.
- Using a triple sifter, [or sifting three times] sift together the flour, baking powder, salt, and nutmeg. Set aside.
- Cut the butter into 1-inch pieces and place in the large bowl of an electric mixer fitted with beaters or paddle attachment to soften on low speed. Increase the speed to medium-high and cream until smooth and light in
- color, about 1 1/2 to 2 minutes.
- Add the sugar 1 tablespoon at a time, taking about 6 to 8 minutes to blend it in well. Scrape the sides of the bowl occasionally.
- Add the eggs, 1 at a time at 1-minute intervals. Scrape the sides of the bowl as necessary. Blend in the vanilla.
- Reduce the mixer speed to low. Add the dry ingredients alternately with the milk, dividing the flour into three parts and the liquid into two parts, starting and ending with the flour. Mix only until incorporated after each addition. Scrape the sides of the bowl and mix for 10 seconds longer.
- Remove 1 generous cup of batter to a separate bowl. Stir the chocolate mixture, then blend it into the cup of vanilla batter, gently folding the
- two together.
- To layer the chocolate and vanilla batters: Spoon one-half of the remaining vanilla batter into the bottom of the prepared pan, smoothing the surface with the bottom of a tablespoon. Using a tablespoon, drop one-half of the chocolate better by spoonfuls around the pan. With the bottom of the tablespoon, spread the chocolate batter, working from the middle to the sides until the vanilla batter is completely covered. Top with a second layer of vanilla, reserving about 1 cup for the last layer. Spread the batter again from the middle, then drop the remaining chocolate batter over the vanilla, spreading it to the edges. End the layering with the remaining vanilla batter, spreading the batter over the chocolate as best you can. You should have three layers or vanilla and two layers of chocolate.
- To marbleize, insert a table knife into the batter with the tip pointed downward and almost touching the bottom. Then lift the knife up and gently fold the two batters together. Repeat by inserting the knife down again, going around the pan at about 2-inch intervals for a total of 10 to 12 times.
- For a less marbled effect, simply run the knife around the pan three times at 1-inch intervals. Smooth the top of the batter. Center the pan on the rack and bake in the preheated oven for 55 to 65 minutes, or until the cake is golden brown on top, and begins to come away from the sides of the pan. A twig of straw or a toothpick inserted into the center should come out dry.
- Remove the cake from the oven and set the pan on a wire rack to cool for 15 or 20 minutes. Place a wire rack over the top of the pan and invert. Let the cake stand about 30 seconds and then gently remove the pan. Allow the cake to cool completely. Glaze the cake or dust the top with confectioners’ sugar.
- Place the heavy cream, light corn syrup, and coarsely chopped chocolate in a small heavy saucepan. 2. Over low heat, stir constantly until the chocolate is completely melted. Do not beat.
- Watch for bubbles to appear on the side of the pot. The mixture should just come to a boil.
- Set the saucepan in a large pan filled with ice water. When the mixture is tepid, blend in the liqueur and vanilla. As the glaze cools, it should thicken to the consistency of thick chocolate sauce. Pour the glaze through a fine-mesh strainer to remove any air bubbles. If the glaze fails to thicken, place
- it in the refrigerator for 4 to 5 minutes.
- Set the wire rack with the cake over a shallow pan to catch the dripping glaze.
- Spoon the glaze over the cake, allowing the icing to drip gently at random down the sides, leaving parts of the cake exposed.
- I baked the cake in a 12-cup Bundt pan. You can also halve the recipe and bake the cake in a 9x5-inch loaf pan, or a 8x8-inch square pan or a 6-cup Bundt pan.
A CELEBRATORY GIVEAWAY!
To celebrate winning The Best Cooking Blog at in this year’s Singapore Blog Awards, I am giving away a set of Philips Jaime Oliver Stick Blender. Set includes hand blender, chopper and whisk.
“The new Philips Jamie Oliver hand blender features a strong 650W motor with a simple “on / off” button as well as a turbo button, ensuring that busy families can enjoy fresh, healthy food every night of the week. The compact chopper stands sturdy on any kitchen counter and is useful when chopping smaller quantities of onions, herbs or cheese. Homemade pesto and salsas are also really simple to make and add a completely fresh touch to your meals. It also includes a whisk that attaches easily to your hand blender top. It is useful when preparing fluffy whipped cream and homemade mayonnaise. The innovative ProMix technology represents the ultimate in speed and efficacy, to deliver only the finest and evenly cut results. The 1.0L beaker with lid keeps smoothies and batters fresh and is really useful when preparing homemade sauces, pancake batters or smoothies with your hand blender. If you don’t finish the batch in one go, pop on the lid and keep it in the fridge for later. It couldn’t be easier!”
To take part in the giveaway, simply click on the icon below!

This post is linked to the event, Little Thumbs Up organised by Bake for Happy Kids and My Little Favourite DIY, and hosted by Diana from the Domestic Goddess Wannabe.

I am also sharing this post with Cook Your Books hosted by Joyce from Kitchen Flavours.
Always a pleasure to be baking with


your cake mould is so unique, I never seen this kind of shape before. it reminds me of the waffle….hihihi. btw, the cake looks nice and yummy! ^^
Hi Thea! I also thought it looked like a waffle and was going to make a joke of it but thought I had better not hehe. Thank you 🙂
I actually thought you had made waffles from the thumbnail picture and am so jealous to see it’s a whole tin!! I must track one of these down… I love the look of it! And as for your cake… Mmmmm looks great Diana! Hazel x
This cake looks gorgeuos!
Thank you LY!
Beautiful!
Many thanks 🙂
Forced I see 🙂 Poor you hee..hee…I just love your bundt pan! With all that sharp -sharp design. And Diana, I like the “you can place your finger and not scream in pain” hah..hah…I will take note of that LOL!
Phong Hong hehe this is my new pan. I love it! Such an industrial design!
Love your pan and your post! FAB results as usual!
Thanks Emily!! 🙂
Hi Diana,
Looks like chocolate has found a way of creeping in on you! Haha!
Your marble cake looks great, really moist and I love marble cakes!
I have a book of Carole Walter bought ages ago, and only tried one recipe so far! Got to take that book off the shelf.
HI Joyce her recipes are very good, but very looooooooooooooooooooong and detailed. Try!
Super star cake! Your marble cake is absolutely A+ perfect!
Thanks Kim!!! You baked the same cake!! 🙂
First of all, Congrats on your win! I think all of us will be happy to begin the journey with our new book. I agree totally that the instructions for Ms. Walter’s recipes are just too long and drawn out. I also like your reasoning for this not being a chocolate cake. I have made several chocolate cakes in a row and that’s why I didn’t choose this one. The mold you chose is gorgeous and glazing the plate was a great idea. Beautiful job!
Hi Sandra, thank you! I agree – this cook is take off my shelf once a month, usually days before the 20th, so yes, I am looking forward to the new book for sure!!!
Hi Diana,
I’m a fan of Carole Walter too! That’s a pretty bundt cake tin!!! … and a gorgeous cake too 😀
Zoe
Thanks Zoe, love CW, but really don’t love deciphering her recipes sometimes!
Love, love, love all of your detailed pictures!!! Your cake turned out fabulous.
Thanks Amy 🙂 🙂
Diana, this looks great. I agree with you on the fact that it was more buttery than chocolate. Sorry to hear the glaze didn’t go to well. Love the presentation of it on the plate, beautiful 🙂
Hey Laura, I used the glaze to dip cookies in the end, so worked out well! 😀
Hopefully next cake choices keep you from chocolate, even though chocolate is delicious we can quickly get bored, if we don’t have other options.
Diana your cake turned out so lovely, that pan is such a fun design!
Yep I agree, not a very chocolaty cake.
🙂
Holly
Hi Diana.. Can I know where to get e pan… And also fr e choc and shortening… & espresso powder… Where do I get it :-)) cheers…
Hi sure –
The pan from the US, the other ingredients you can get from major supermarkets, or specialty shops like Phoon Huat and Sun Lik.