I spent most of my life avoiding anything to do with yeast. But recently, I started playing around with bread recipes. And I am well and truly hooked.
My friend, Evelyn, kindly shared this recipe for kopitiam bread with me. This is a basic bread recipe, so you can add whatever you like, and shape it however you like, and at the end of the day, you should be able to produce soft and fluffy bread.
Well, if a novice like myself managed to do it, then I am sure any one else will be able to as well!!
Here’s how to make this bread. I started by making the starter dough. The starter dough, once made, can be store in the fridge for up to 7 days, and used whenever you are ready to bake bread.
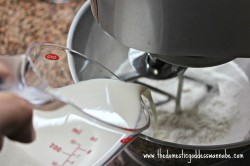
In a mixing bowl, I sifted bread flour, and added the yeast and cold milk. Using a paddle, I mixed them until they started to come together. This took 3 minutes using my mixer, but you can also do this by hand.
I pressed the dough to form a ball.
This was placed in a container and kept in the fridge overnight, or a minimum of 12 hours. Do not skip this step!
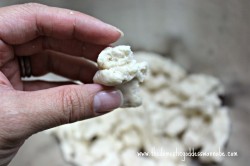
When I was ready to bake, I tore the starter dough into pieces – no need to wait for the dough to come to room temperature – and placed them in a mixing bowl.
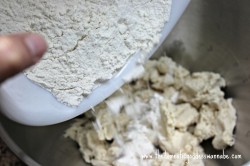
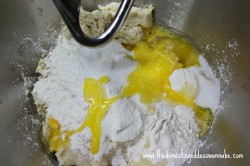
To this, I added more sifted bread flour, yeast, salt, milk, sugar and egg. Please remember to measure everything using your weighing scales.
You will end up with this.
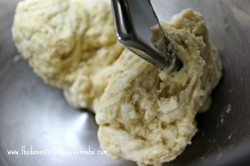
Using a bread hook, I started mixing. And kneading. You can also do this by hand if you wish.
Once the dough had become smooth, I added the butter. And continued kneading.
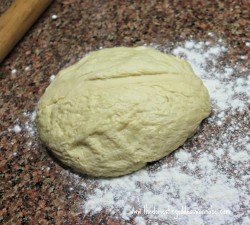
I completed the kneading process by hand because I prefer to “feel” the dough. It should be smooth and elastic.
I shaped this into a ball, coated it with a little oil, covered the bowl with a damp cloth, and left it to proof in the mixing bowl. Until it had doubled in size.
Then I divided the dough into smaller portions. In this case, I weighed each portion so that they were more or less equal in size.
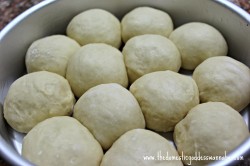
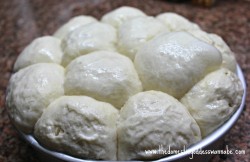
I shaped them into little balls, and placed them in a greased baking pan.
I left them to rise some more (covered again with a damp cloth).
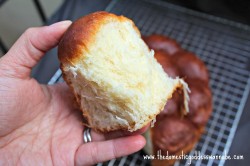
Finally, I brushed some milk on the bread dough, and baked them at 180C for about 25 minutes.
If you find that the bread had harden a little after a day or two, simply zap them in the microwave oven for about 10 seconds and they will be soft again.
Gosh, I really love this recipe!! 🙂


- 215g high protein flour - I used bread flour
- 125g milk (cold)
- 2g instant yeast (1/2 teaspoon)
- 1 quantity of above overnight sponge dough
- 90g high protein flour - I used bread flour
- 30g egg (1/2 large egg)
- 4g instant yeast (1tsp)
- 3g fine salt (1/2tsp)
- 60g sugar
- 45g butter (room temperature)
- 1tbsp milk (cold)
- Add all ingredients in a mixing bowl, combine all ingredients to a rough dough by hands , the dough is dry and rough and don't need to knead till pass window pane. Cover tightly with cling film and immediately store in the fridge for overnight (at least 12 hours).
- Tear the overnight sponge dough into pieces and add all ingredients except butter in a mixing bowl, knead till smooth dough.
- Add in the butter and knead until dough is smooth and elastic. Cover with cling film or wet towel and set aside to proof till double in size.
- Punch down the dough to expel air, equal divide the dough to 9 portions (I divided mine into 13 portions, about 45g each), shape into round balls. Place dough in a square pan. (I used an 8-inch round pan.) Let it proof for another 30-45 minutes.
- Brush with milk. Bake at pre-heated oven at 170C for 20 minutes. (I baked mine at 180C for 25 minutes)












Hi this sounds really interesting! I love finding bread recipes that are from Singapore/Malaysia! If I’m kneading by hand, roughly how long would I need to knead? Asking as I’m new to baking breads and only just started with no-knead breads thus far and do not have stand mixer. Thanks!
Hi Kelly It took me about 10 minutes to knead. Not long at all really. I prefer kneading by hand because it gives me better control and I don’t over knead.
Hi Diana, I see that you used overnight dough and tang zhong method for your bread. May I know what’s the difference between the 2 methods and which type makes softer buns? Thanks Elaine
HI Elaine TZ is softer. However, you can make the starter for OD and keep in the fridge to use within 7 days which can be very convenient. I like both but I would say TZ produced bread that is a tad softer.
Hi, following this, I would like to ask if this recipe can add TZ?
Hi I don’t think so. This recipe already has a starter dough.
Diana,
My dough is in the progress of proofing now. 15 mins has passed… the size of the dough doesn’t seems to grow bigger in size 🙁
Can send me your mobile to my email? I would like to take pic and show u.